Are you ready to take your quilting to the next level? If you love precise seams and intricate designs, paper piecing might be your new favorite technique! This method allows quilters to create stunning patterns with accuracy that traditional piecing often can't achieve. If you’re new to the world of paper piecing, don’t worry—we’ve got you covered. Let’s walk through the basics so you can start stitching beautiful quilt blocks with confidence.
What Is Paper Piecing?
Paper piecing, also known as foundation paper piecing, is a quilting technique where fabric pieces are sewn onto a printed paper template. The paper acts as a guide, ensuring each fabric piece is sewn in the correct place, resulting in perfectly sharp points and intricate patterns. Unlike traditional quilting, where precise cutting and seam alignment are essential, paper piecing offers a more forgiving approach that guarantees accuracy.
Why Try Paper Piecing?
-
Precision: Achieve flawless seams and perfect angles without complicated measuring.
-
Complex Designs Made Easy: Create detailed patterns with minimal frustration.
-
Great for Small Scraps: Use up your favorite quilt fabric leftovers in creative ways.
-
Ideal for Beginners and Experts Alike: A structured way to learn piecing techniques while still allowing for creativity.
-
Less Waste: Since you work directly on a foundation, there’s less risk of cutting pieces incorrectly.
What You Need to Get Started
Before you begin, gather the following supplies from your favorite fabric store:
-
Paper Piecing Template: You can print these from various quilting websites or find them in pattern books.
-
Quilt Fabric: Choose high-quality cotton fabric in a variety of colors and prints. Pre-washing your fabric can help prevent shrinkage later.
-
Rotary Cutter and Cutting Mat: For precise fabric cutting.
-
Sewing Machine and Thread: A small stitch length (1.5–2.0) helps with accuracy and makes paper removal easier.
-
Iron and Pressing Mat: To press seams as you go for a polished finish.
-
Add-A-Quarter Ruler: A specialty ruler that helps trim fabric pieces to the correct size with a 1/4-inch seam allowance.
-
Glue Stick or Fabric Glue Pen: Helps temporarily hold fabric pieces in place before sewing.
Step-by-Step Guide to Paper Piecing
1. Prepare Your Template and Fabric
Print or trace your paper piecing template onto lightweight foundation paper. Cut your quilt fabric into pieces slightly larger than each section of the template. This extra fabric ensures that your pieces will cover the required areas after stitching.
2. Sew Your First Pieces
-
Place your first fabric piece right side down on the back of the paper, ensuring it covers the intended section with extra allowance.
-
Align your second piece with the first, right sides together, with the edge overlapping the stitch line by at least 1/4 inch.
-
Secure the pieces with a pin or dab of glue.
-
Sew directly along the printed line on the paper, extending stitches slightly beyond the edges.
3. Trim and Press
-
Fold the paper back along the stitched line and trim excess fabric, leaving a 1/4-inch seam allowance.
-
Press the fabric open using an iron to ensure smooth and flat seams.
4. Repeat the Process
Continue adding fabric pieces in numerical order, following the template. Sew, trim, and press after each addition. Ensure each fabric piece fully covers its designated section before stitching.
5. Remove the Paper
Once your block is complete, carefully tear away the foundation paper along the perforated stitching lines. Tweezers can help remove stubborn bits of paper stuck in the seams.
Tips for Success
-
Use Thin Paper: Regular printer paper works, but specialty foundation paper is easier to remove and folds more smoothly.
-
Reduce Stitch Length: This helps perforate the paper for effortless removal and adds stability to the seams.
-
Practice on Simple Patterns First: Start with basic shapes before tackling intricate designs.
-
Lightbox or Window Trick: Hold your fabric and template up to a light source to check placement before sewing.
-
Stay Organized: Labeling fabric pieces or color-coding sections on your template can help keep track of your design.
-
Invest in a Seam Ripper: Mistakes happen! A seam ripper will be your best friend for undoing misplaced stitches without damaging fabric.
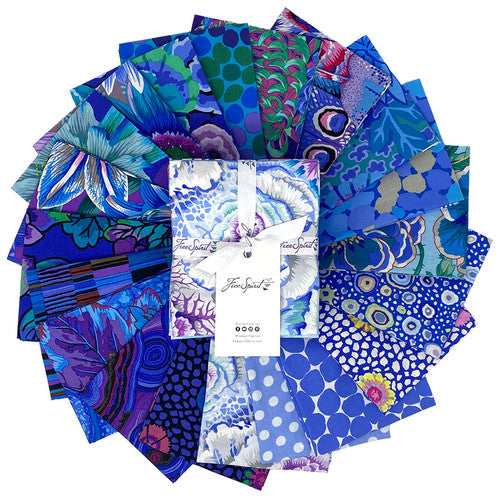
Find the Perfect Fabric for Your Paper Piecing Projects
Having the right quilt fabric makes all the difference! Whether you’re looking for vibrant solids, playful prints, or timeless florals, our online fabric store has a wide selection to bring your paper piecing designs to life. Browse our collection today and get inspired!
Are you ready to try paper piecing? Share your first project with us in the comments or tag us on social media. Happy quilting!